Showing posts with label DIY. Show all posts

Tuesday, August 5, 2014

Cherries and Christmas Drinks!

I know it's August, and still a little too early to be thinking about Christmas but sometimes you just have to plan ahead! It's toward the end of cherry season, so I stocked up on a couple of pounds and made my Grandma Shirley's "Christmas Drink."


I removed the stems and rinsed the cherries (they have one of the highest percentages of pesticides and chemicals on them). I had about 7 pounds. 2 large (about a gallon each) containers held 3ish pounds each, then one half gallon to hold the rest.


Once divided up into their respective containers, I covered the cherries with 2 cups of white granulated sugar (1 cup for the smaller jug). I could eat them all just like this....

Then.....fill up with a liquor of your choice! I chose brandy because the sweetness of it will lend well to the drink. Stir to dissolve sugar and seal it up!

And now......we wait.......about 3 months or so. I continually stir the mixture to make sure the sugar is dissolved. My Grandma called it her "Christmas Drink" because that's when it was ready to be enjoyed!!
carrvingoutmycorner@blogspot.com

Friday, June 27, 2014

Wedding Dress Success! Simplicity 1775 & Simplicity 1876 Part One


So, as I've said in a previous post, I made my wedding dress. The fact was that I couldn't find what I wanted in my price range (under $500). I know I had a very small budget for the dress, but I figured it was a Vegas wedding- I didn't need to go balls to the wall!

Elandra--2 Piece, Lace and Silk Wedding Dress
 I started with finding my inspiration. I scoured Etsy and eBay for vintage dresses. Too bad I don't have a size 2 rib cage...... But I did fall in love with Leann Marshall's design.

I did some more research and realized she has a line of patterns with Simplicity, and I could probably finagle something out of those!
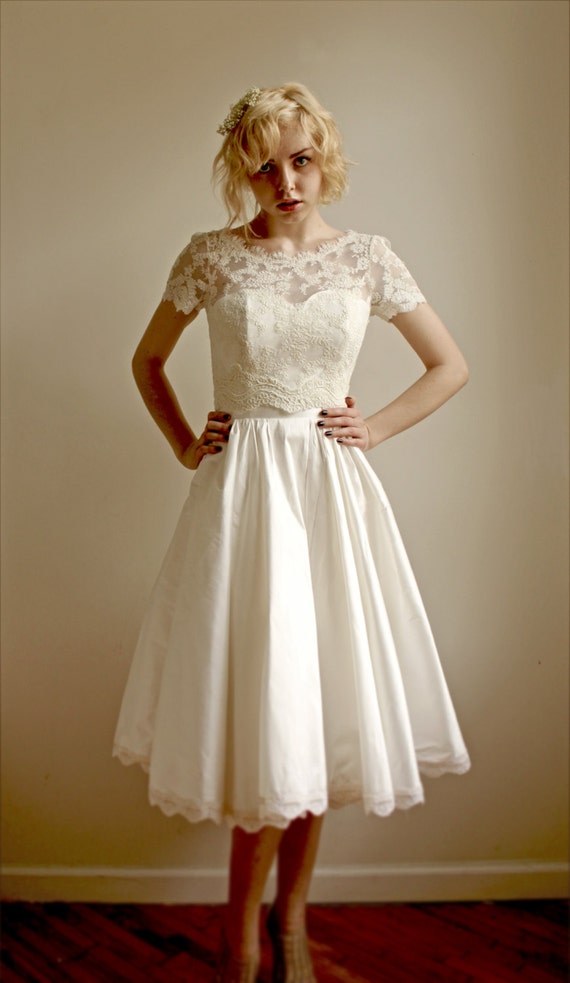
    I used the bodice from 1876 and then made 3 different skirt bottoms, because, well,  I couldn't make up my mind. I did 2 skirts from 4070 and the one skirt from 1755 (which I've made before and loved)
What a goonie face...

The first one has no pleats, just cut on the bias. It's a very flattering cut, but just wasn't enough of a statement for a wedding dress. Dress 2 has some pleats.  I liked the volume it added, but still not enough. Dress 3 has millions (ok, not millions) of knife pleats, giving the skirt tons of volume.

Step one: Done!


Thursday, June 26, 2014

Out in the garden

 There is something so satisfying about having a garden. Hard work is involved; hoeing, tilling, weeding, digging, planing, mulching, watering. Repeat. But the results are bountiful. The obvious vegetables and flowers, yes. But something so much more rewarding when a day's work is done, to sit back with ice water and admire your work. To be outside and feel the sun on your skin, the dirt in your nails, the sweat even! I sleep so much sounder after the days in the garden.

I love the fresh air, being outside and doing something. I feel like it's my form of meditation. My moment to feel and observe. I find myself lost in watching birds play in the water, squirrels chase each other, and hearing the children play outside at the daycare near by. I could spend all day outside.


 Small, but wonderful

Thursday, May 29, 2014

Wedding Invitations

As noted before, the Man and I are into the retro scene and with that comes tattoos! Right away, I knew our wedding invitations to reflect our style, and I knew I was going to design them. So here's a little sneak-peek of the process of our tattoo styled wedding invitations.


 I, then, painted in the image with a mixture of watercolor and gouache and then cleaned up the outlines again with the India ink. 
 
I uploaded the finished painting into Photoshop and cleaned up with image and added little details to make it look reminiscent of a playing card. Overall, I'm quite happy with how they turned out. And-it was economical! We had 250 invitations printed and it cost us around $200.

Tuesday, May 20, 2014

Sewing Room & New Look A6094

A view from my mess sewing room. I'm working on a quick project, since I'm always for wont of dresses!

I picked up New Look's A6094 pattern a while back because I was, well, bored. New Look are, how you say... economical patterns and I think I got this one for under $3. And, frankly, it works like a cheap pattern. The total ease in this particular pattern is 2 1/2", so in my (limited) experience, there will be a lot of fitting to make the dress look nice.

 I've already had to modify the bodice, but that didn't come as a surprise to me, since I usually have to do that with every pattern. My "problem" is that I have a smaller bust, but a larger waist. So I generally cut the pattern to fit my waist, then alter accordingly (my boobs just ain't that big!) The sleeves of this are going to be frustrating:
The pattern doesn't have the sleeve go all the way around, leaving a large unfinished gap by the armpit. The solution that they provide is using bias tape...I'm not too thrilled with this.

The fabric that I'm working with is a vintage full-sized bed sheet that I picked up for like maybe $4 at St. Vincent De Paul's. Sheets are one of my favorite 'secret' resources for fabric. They are a decent amount of fabric (enough to make a dress with a full skirt), you can find some pretty cool and interesting patterns and THEY ARE CHEAP!

Never enough projects.......never enough dresses......

Tuesday, May 13, 2014

Wow......I've Really Been Slacking.....

Where have I been?? What have I been doing?? Well, nothing and everything, I suppose. I've been feeling very uninspired to post, and I've been busy with my wedding and our day to day lives.

We jumped on a plane and got married in the mediocre (more on this later) city of Las Vegas!
I did make my wedding dress, and plan to do a separate post about it.
Yes, we got married by the King!


We accomplished what we set out to do: Get married. However, we overstayed our welcome-or perhaps Vegas overstayed its welcome with us. We were there for 8 day-far too long for people who don't really gamble. It was a far more expensive trip than we had previously thought it was going to be, and there were bumps along the way that didn't help our financial situation. BUT! the weather was perfect, and the days that we did find ourselves beside the pool were the best.

AND THEN WE GOT SICK! now we don't know if it was food poisoning or a stomach bug, but 10 or so of the people who came out with us also got sick. Nothing like spending the first days as a married couple miserable in your hotel bed taking turns for the bathroom. :/ We laugh about it, because honestly, that's our luck. In sickness and in health, right?! and isn't the point of a good vacation yearning for home by the end nears? I was seriously happy to be home with my husband and our kitties, it was a wonderful feeling of family and togetherness that started off our marriage.

Wednesday, September 11, 2013

My Side Work


Just recently, I decided to turn one of my hobbies into a somewhat "professional" side job. In this decision (read: talking myself into it and getting over the fear of it), I felt that it was something to make a little money and, more importantly, a way to hone my skill. I specialize in pencil (graphite) portraits. I find myself fascinated by drawing the little details. I LOVE drawing ears, and I LOVE how the eyes really breathe life into the portrait. So, I've been a little busy. Surprisingly so. And, for the most part, it's all been word of mouth. I do a portrait for one person, then someone sees that portrait and contacts me. It's been pretty steady :)

Look at that messy mirror :/ It was a hot day and I felt that I was having a unusually good hair day. I HAD to document it.

Wednesday, August 21, 2013

Success! Simplicity 1755


Simplicity 1755 leanne marshall
I feel so accomplished! I actually, finally finished* a sewing project in a timely manner!  I had this fabric in my stash for a while and I had picked them up at my favorite thrift shop, knowing I wanted to use them together. When I laid eyes on the Simplicity pattern 1755, I knew the fabrics had a destiny. The pattern was really a breeze. Any problems that I ran into were the fault of my own, sleep deprived brain. I usually am hesitant with full skirts, as they tend to make me look hippy. I love how this skirt/bodice combo make my waist look slim(mer). I also love the loose raglan sleeves that fit over my "helga" arms (you know what I'm talking about *points to mom*). I found it a simple delight that the seams and pockets were hidden in the pleats of the skirt. I also lined it with a flamingo pink pop of color. 

The reasons I usually procrastinate with sewing projects is: HEMS AND ZIPPERS!!!! 
<insert a slew of curse words and tears of frustration>

YET! this time around, I think I finally got the hang of zippers, all it really took was one handy trick: 
READ.THE.INSTRUCTIONS.  who knew.

*I have not totally finished this, there is a belt in the works.

Simplicity 1755

It's sooo "back-to-school"!! I need to work on my posing, haha :/.... also, you may note that in one picture I'm wearing thigh high stockings. Well....these photos were taking on a day that reached almost 90 degrees outside, and it was more than likely hotter in our apartment. SO, the stockings didn't last.

Monday, August 19, 2013

Just a Quick Pickle

Tended to the garden today, and although we have a lot of things almost ready to ripen, there is very little that we can pick right now. One of the things that happens to be thriving is the jalapenos. I didn't want what I picked to go to waste, so I decided to do a small batch of pickling.


 I threw in some oregano from the garden (which also seems to be doing quite well) and a green tomato that prematurely fell to it's death. I felt I should honor his short life by pickling him into eternity.


I sliced everything up and threw it into 2 small canning jars. They now decorate the inside of my fridge, too pretty to be opened.

While I was out in the garden, I turned on the sprinkler. To my amusement, several young robins flew in for a shower. They must have been in the 'teenage' stage of robin life because they weren't flighty around me and in fact seemed to have unjustified invincibility. They took turns flying into the water stream, and would puff up their feathers and hop around on the ground following the sprinkler.


I found it hilarious. It doesn't take much...

Tuesday, August 6, 2013

In the Garden

I'm getting so excited for our garden! In this aspect, time cannot go fast enough. We planted our garden a little late in the season, I believe it was after Memorial Day. Initially, I was a bit worried but because of our procrastination, we missed a late frost! Our garden was saved and after planting it has been a waiting game.....


....I'm not good with waiting games.

We knew we wanted tomatoes and bell peppers because we eat them all the time. I also wanted plants that I could preserve for enjoyment later in the year. The watermelon was the Man's idea, a "why not" purchase. The onions were an after thought, they looked dried up and dead and I had no idea what they required. I must be doing something right, they seem to be thriving.

Ripen already!
There are 4 variety of tomatoes: Celebrity, Heinz Heirloom, Black....um....something-or-other, and one other kind (I'm embarrassed I can't remember at the moment....). I have many plans for *hopefully* the bounty. Salsa, marinara, ketchup, fried green tomatoes at the end of the season.


The Bell Peppers are slow to get going, and I'm hesitant about what we are going to yield. There are 3 types: Early, Yellow and Red.

And then of course, the herbs! From my experience, Basil and Oregano are the easiest to grow. They are prolific and very little tending. I just keep pinching the tops off and they keep spreading!


My little garden helper :)

Wednesday, July 31, 2013

Quick Project


 As usual on my Saturday shift break, I decided to go-a-thrifting. I normally don't go looking for anything in particular. Rather, I just try to look at everything and bide by time. Holy-Moley! I got lucky and came away with a big haul. I found a 1950's Zenith tabletop radio, a set of gold bar glasses and THIS beauty. As you can tell, it doesn't look pretty. I imagined that some grandmother tried to "refashinon" it to make it cool for their grandchild, and it ended up in the thrift store :(  The top cushion was covered with blue knitting and the rest was unlovingly doused in baby blue spray paint.
First things first, I cut off the web of yarn, and found a white pleather/vinyl material. It's not in the best condition. It's stained by age and/or smoke that left a yellow tinge behind. Around the buttons, it has begun to tear. All I ended up doing is scrubbing it with bleach.

Now to the nitty gritty: CHEMICALS! The Man and I went to the local hardware store and picked up an aerosol chemical paint stripper. I generally like chemical strippers because it does a lot of the elbow work for you. My only beef with this one is the way it sprayed. The nozzle only has one setting and it sprays in a stream, making it slightly more difficult to be precise. I also felt like a lot of product was wasted because of that. That being said, it helped removing the paint with minimal effort on my part. I scraped it off with a plastic noodle measurer (sorry, honey :/ ) but I would recommend an actual tool,  or an old credit/debit/I.D. card. Then attacked it all with 000 (very fine) steel wool. What didn't come off then, got a second coating of the stripper.
Under the baby blue spray paint, the legs had a thick ugly varnish. Although that would have been the original finish, I prefer to see wood grain. I think it's pretty. The brass tips needed very little TLC, I just stripped the paint and polished with the steel wool. I stained the wood legs with 2 coats of Minwax Polyshade in Olde Maple Satin.
I should say that I tore this thing apart. Any piece that could be unscrewed or just plain ol' pulled off like an animal was. After the brass binding was separated, I treated it just like the tips-just a polishing with steel wool. Then, I spray painted the top with one of my favorite colors: Krylon Indoor Outdoor in Satin Pistachio. I, personally, think that it compliments the brass fittings and the natural wood quite well. With the Rust-Oleum American Accents Bright Metallics in Gold, I painted the mounting plates and the "handles." They were rather tarnished.

Overall, I'm rather happy with the results. I may, eventually, do something with the cushion, but for under $25, I can't complain.

Footstool/Bench: $5.00
Paint Stripper: $9.00
Pistachio Paint: $3.75
Steel Wool: In Inventory
Gold Paint: In Inventory
Stain: In Inventory

Tuesday, July 9, 2013

IT'S ALIIIIIIVE!!

Since the man and I are all about vintage electronics, it would only be fitting for us to have a working record player. Well, easier said than done.  We lived on a limited budget which makes our search even more difficult. Of course we can just buy a fully working, refurnished/refurbished vintage record player.......for upwards of our life savings!! But, we are thrifters and every where we go we keep our eyes peeled for a record player. On one of our most recent trips to Racine, we picked up this beauty.
(I wish I had the forethought to take "before" pictures *d'oh*)
It was sitting, lonely and dusty, in the 'Clearance Corner.' There was some other objects sitting on top of it, but I was sure it was a record player! We opened the top and lo and behold, a radio and record player with a little homemade label marked "1967." We quickly moved it toward an outlet, crossing our fingers. At this point we attracted some attention from other customers, who were more than happy to share their thoughts on the subject of record players. It's funny how people are so eager to share their stories about "the good old days," and how "you young kids probably don't even know what this is!" We get a good laugh out of this. We are 34 and 29, respectively, and dress like we walked out of the 50's, with a working knowledge of record players, hehe. But, we indulge them. Annnnnyyy way....I digress. It was marked $60 originally, reduced to $20. We plugged it in and it lit up, the table turned begrudgingly, and we knew it was ours.

Here's where I really wish I took before pics.  The top was full of water stains, some of the varnish and stain had worn off. The legs were wobbly, we didn't know if the radio or speakers worked, much less the actual record player. We debated about whether to keep it wood toned (which I am almost always a proponent of) or to paint it a funky color and whether to keep it a record player/radio or gut it and turn it into storage.

Here it sat in our "second living room" with all of the other projects.
 Well, our questions were answered when we plugged it in at home. The radio worked, along with the speakers. The turn-table still turned slowwww, but it moves, so we're taking that as a good thing.  No gutting. I assumed the piece was mostly solid wood. I assumed wrong. I got to sanding the troubled spots only to find that it is in fact a veneer. Nevertheless, we are still going to sand and stain it.
The Man in action!
The legs and the front speaker cover, mid-process.
 I never thought sanding off old varnish would take soooo much work :/ Lots of literal sweat is going into this project since we are working on this in the humid Wisconsin summer.